User Guide
How to get bioGUI?
Download bioGUI releases from the github releases. Please note additional information provided in our User Guide.
Install bioGUI
Binary packages/releases for the following operating system are provided on github.
Windows
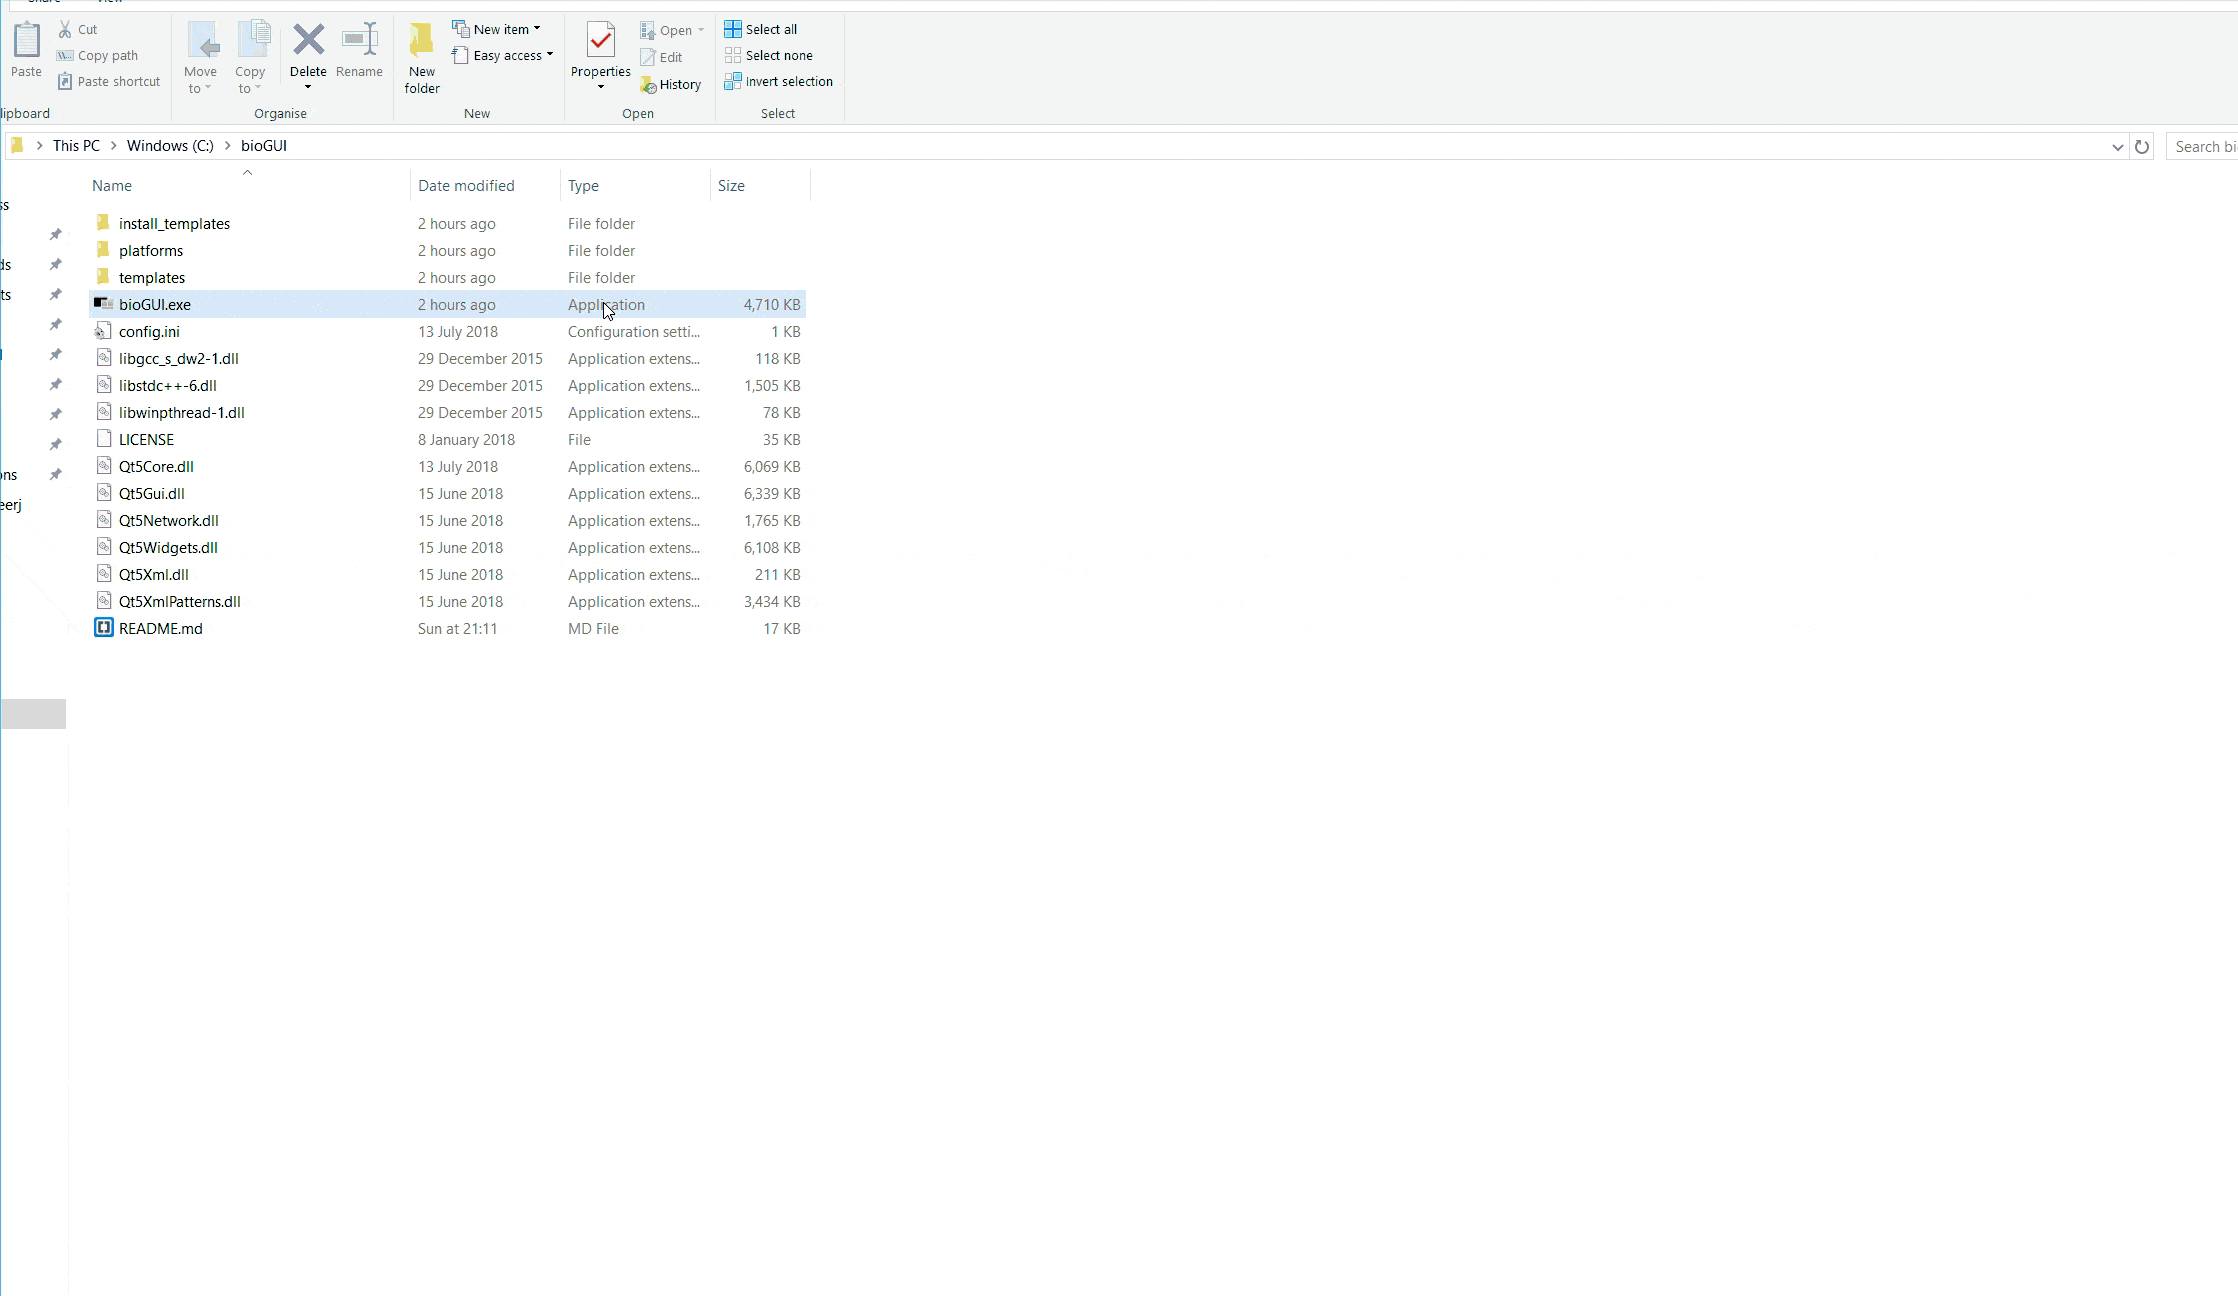
Extract the zip-File and place the contained bioGUI folder somewhere on your hard drives.
Follow the instructions to setup WSL: How to setup WSL (Bash on Ubuntu).
Please do not put bioGUI in your Program Files directory, as this is specially protected by Windows and may cause problems.
Place bioGUI into a location which does not contain spaces in its name, e.g not C:\Program Files\bioGUI !
You can put bioGUI for instance into the locations C:\bioGUI\ or D:\bioGUI\ !
If you want to access external drives (USB stick, network drive), you first need to mount this drive into WSL. The WSL Mount Drive install module will install a script which can do this for you. Make sure to save the template and use the Mount Drive (WSL) template to make the drive available to WSL. You need to enter the drive-letter you want to mount (e.g. F), and your sudo password.
Linux
Extract the tar.gz file and place the contained bioGUI folder somewhere on your hard drives.
On Ubuntu you can then execute the bioGUI.desktop file, e.g. from your Explorer equivalent, or being in the bioGUI folder, the command-line: dex bioGUI.desktop (you may need to install dex first: sudo apt-get install dex).
Alternatively you can also simply execute sh ./bioGUI.sh.
Mac OS
Download and open the provided dmg package. You can simply drag and drop the bioGUI.app into your Applications folder.
bioGUI has been built for Mac OS X 10.14 Mojave. Mac OS may bother your about running an app from a non-signed/verified developer.
In the Preferences->Security menu you can tell Mac OS to still run bioGUI.
In order to use bioGUI, it may be required to install the OSX command line tools as well as brew.
For the command line tools, open a Terminal and enter xcode-select --install.
You can get brew from here
To test brew, simply run the following code:
brew install wget netcat
Make sure to have brew in your path.
From the terminal, run:
echo "export PATH=/usr/local/bin/:\$PATH" >> ~/.bash_profile
This will tell Mac OS to look for (unix) applications also under /usr/local/bin/. This is where brew installs itself.
Installing new software with Install Modules
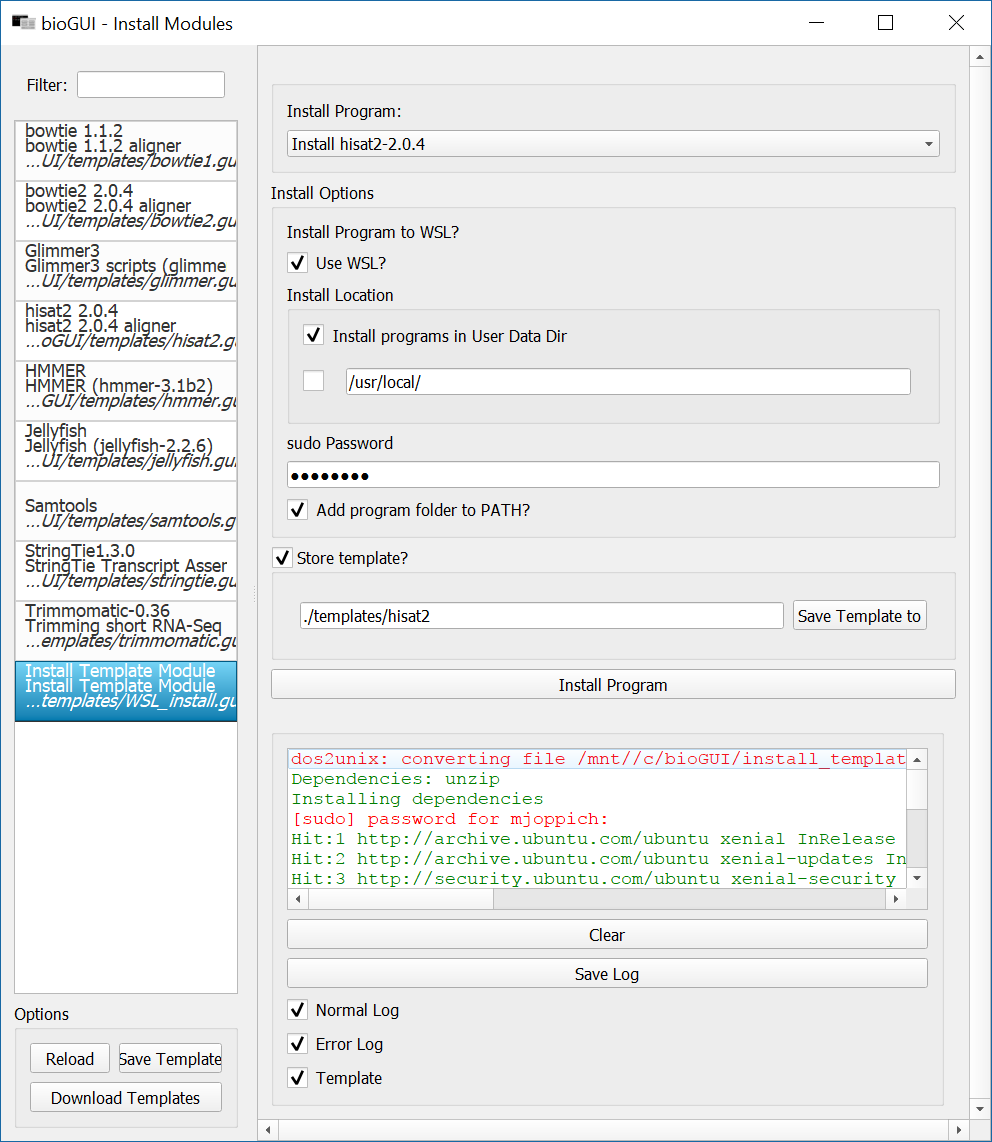
After downloading an Install Module, the Install Template Module will list the downloaded install template (you might need to reload once).
The screenshot below shows the Install Template Module.
In the dropdown menu, the hisat2 install template has been chosen.
Since this module is executed on Windows, WSL is selected.
hisat2 is supposed to be installed into the User Data Dir, which is on WSL and linux usually ~/.local/share/bioGUI.
This is the directory where bioGUI installs new programs.
Advanced users may want to change this settings, but in general, it should be left.
In order to automatically install dependencies, the sudo-password must be supplied. This is the password you set up during the installation of the WSL feature. This gives bioGUI administrative rights within WSL such that it can install dependencies automatically.
Finally the path for the specific GUI template has to be set. bioGUI by default only searches the template directory besides the executable.
GUI templates must have the file extension .gui. If your entered template name does not end with this extension, the extension is appended to your filename.
As a short-cut, if you just enter a name (e.g. mygui), bioGUI will save the new template in the template directoy with the filename mygui.gui.
Use-case: Windows setup
The binary distribution (zip-files) are targeted for end-users: [prebuilt binaries](https://github.com/mjoppich/bioGUI/releases). Download the Windows version.
Make sure that the Windows Subsystem for Linux (WSL) is installed. Please follow the steps on [how to setup WSL](http://biogui.readthedocs.io/en/latest/build_wsl.html).
After downloading the zip-archive, please unzip the archive to a location of your preference. Then simply start the executable (bioGUI.exe on Windows). Place bioGUI into a location which does not contain spaces in its name, e.g not C:Program FilesbioGUI ! C:bioGUI is fine though!
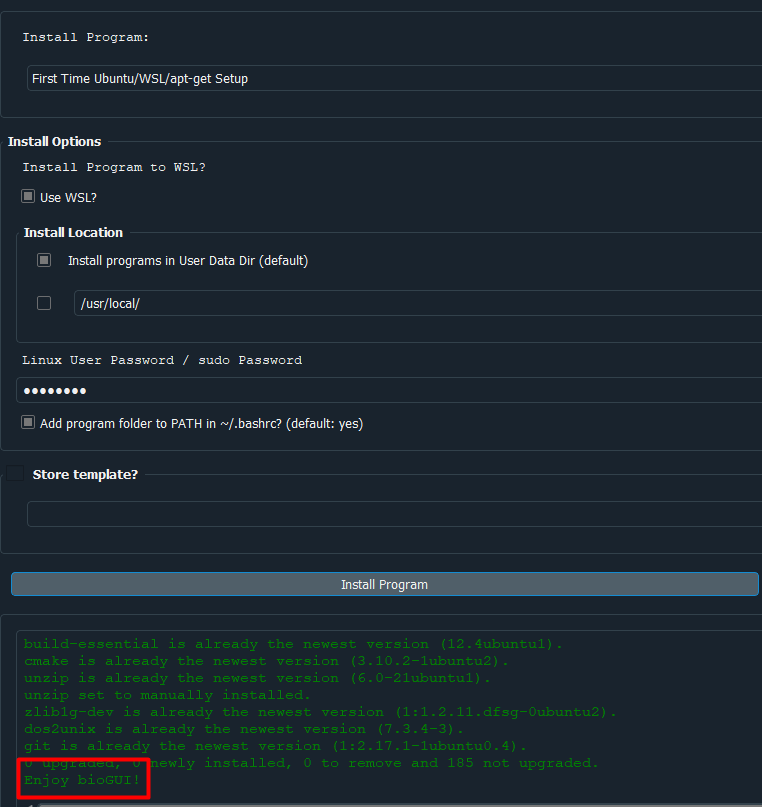
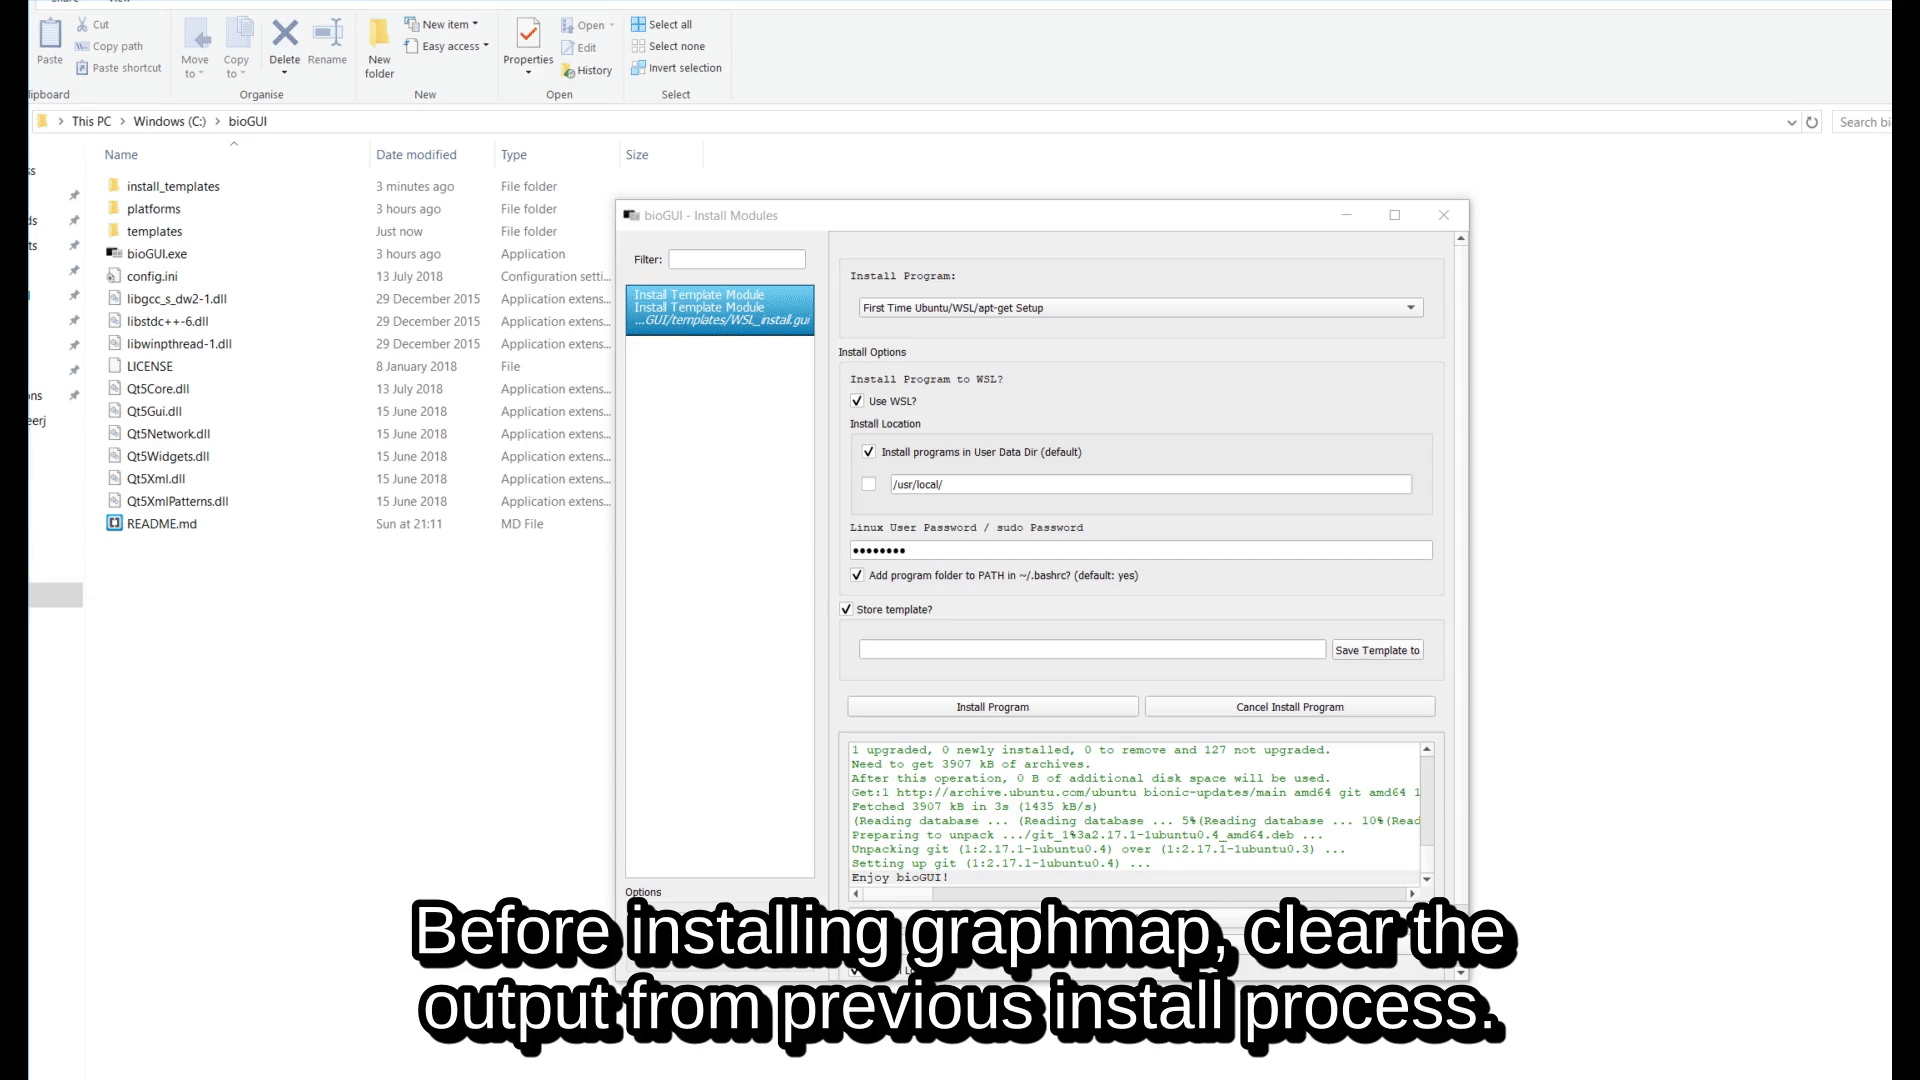
On any aptitude supported platform (e.g. Windows with WSL, Ubuntu), please download the “First Time Ubuntu/WSL/apt-get Setup” from the list of available templates and install it via Install Template Module (install program: First Time Ubuntu/WSL/apt-get setup).
Below this process is shown by an animation.
Setup First Time Use
For the First Time Use setups, please make sure to insert your sudo/user password and deselect to save a template.
Please make sure that bioGUI closes the setup with the following message:
If you do not see this message, (raise an issue on GitHub) with attaching the log.txt file in the bioGUI folder, or /tmp/log_biogui.txt on Mac OS, as well as an screenshot of the attempt.
Install an install module
After the install module has been installed, you will see a message stating that bioGUI installed the software:

If you do not see the message, but only blue text, like below, you need to scroll up:
If you do not see this message, (raise an issue on GitHub) with attaching the log.txt file in the bioGUI folder, or /tmp/log_biogui.txt on Mac OS, as well as an screenshot of the attempt.
Use an Install Module
After installing a software, e.g. graphmap, you can reload the list of available templates by pressing the reload button.
Download the install module for graphmap as shown in the previous section. Next select the graphmap install module in the Install Templates template and fill out your Linux User Password/sudo Password. If you are on Windows, make sure that the Use WSL? checkbox is selected.
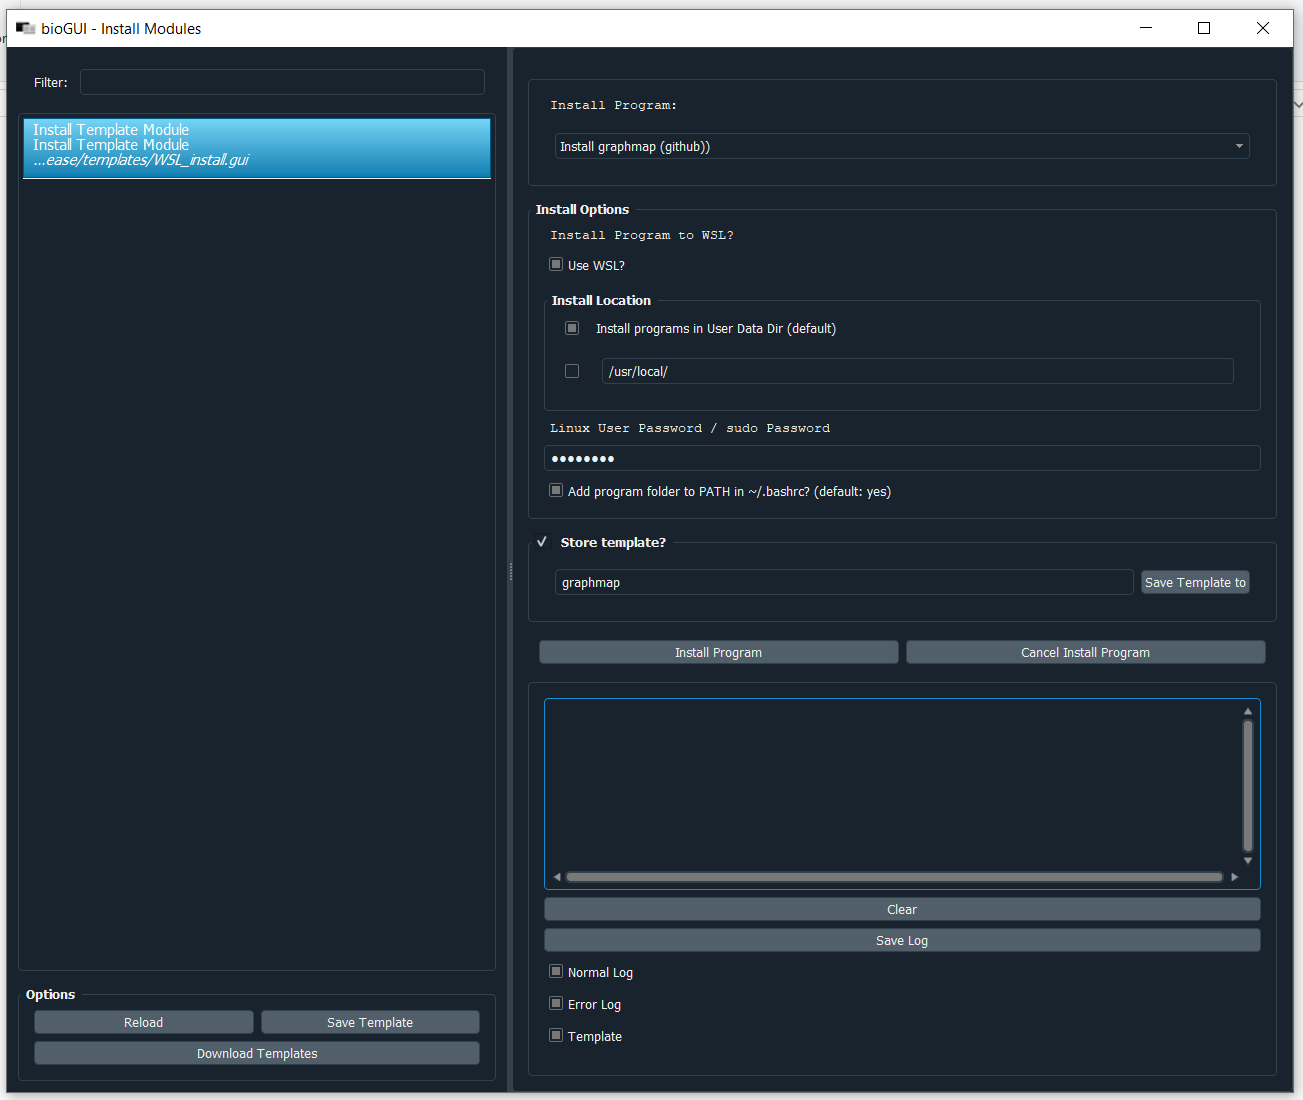
Enter the name of the template you would like to use in the input field within the Store Template group box (which you should have selected). In order for bioGUI to find a template it must reside in the template folder next to the bioGUI executable. Finally press Install Program and wait until the installation finishes. Besides the template being sent to bioGUI (in blue text), you should see the green message that your program has been installed correctly:

You can now Reload the templates again and will see a graphmap template on the left:
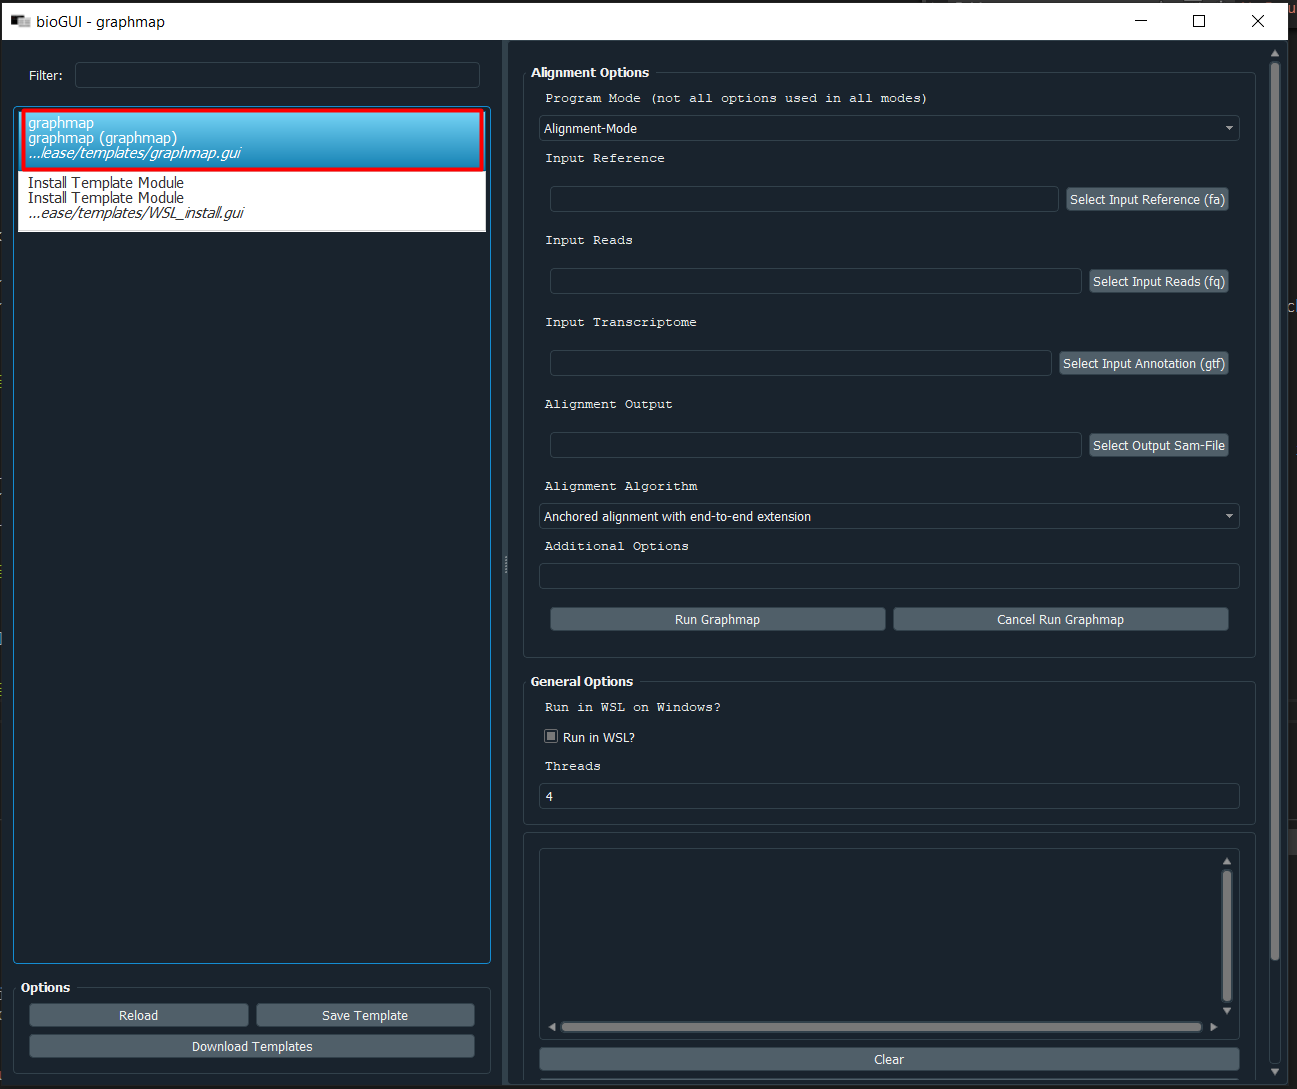
In this template you have to possibility to select the alignment mode (align or overlap/owler), specify the reference sequence, reads, gene annotation file (for splice-aware alignment) as well as the output file. To select files via a file dialog, click the corresponding button on the right. Using the Additional Options field, you can also enter command-line parameters directly. This may be necessary because the template is not complete, or new options have been added (or because you know shortcuts).
Exemplarily we filled our some parameters:
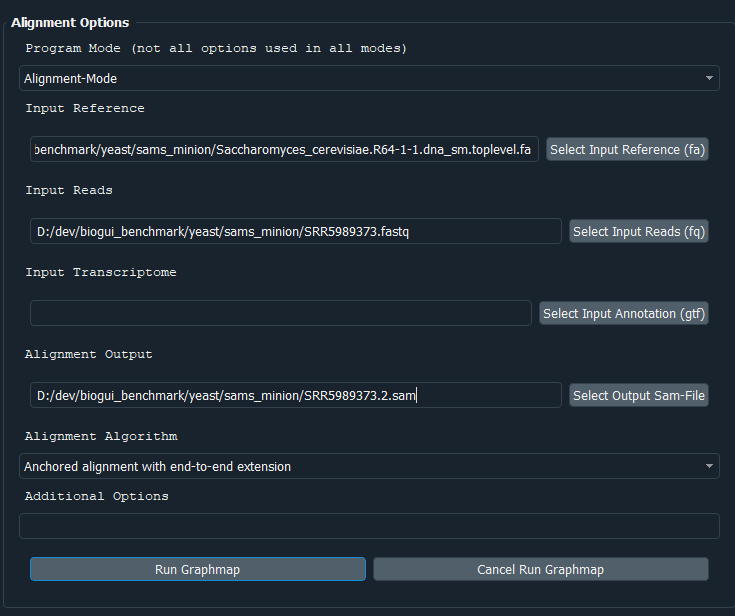
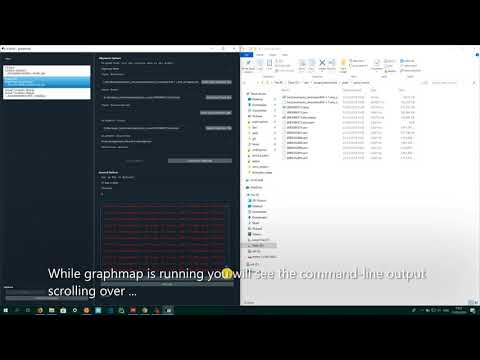
Clicking on Run Graphmap will now execute graphmap via bioGUI. In this case, the called command-line tool is graphmap -r <reference> -d <reads> -o <output>.
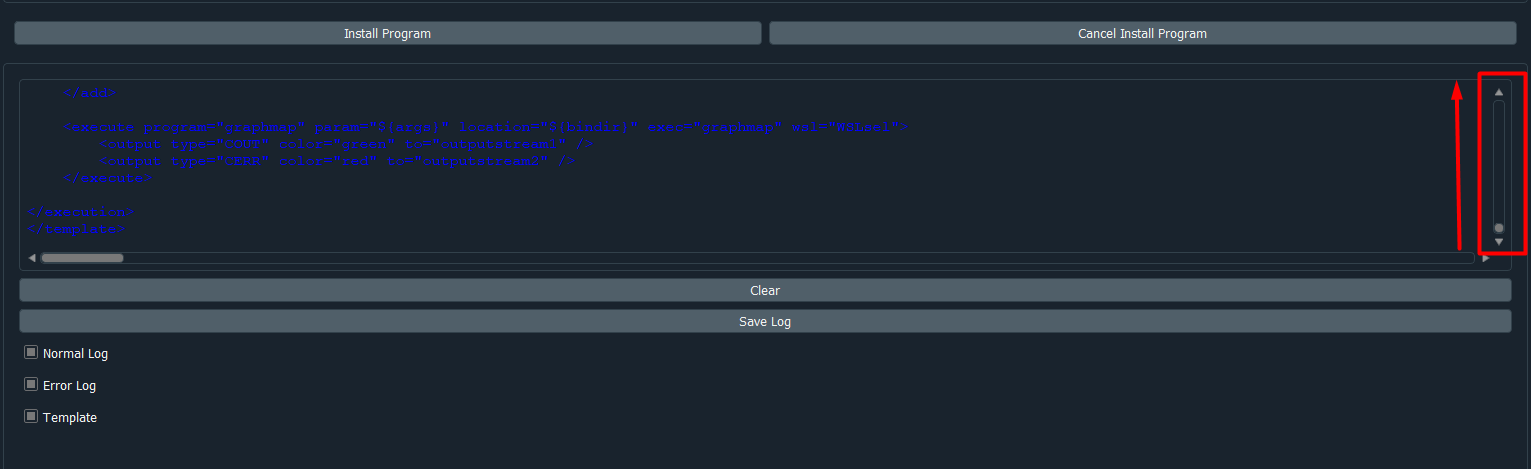
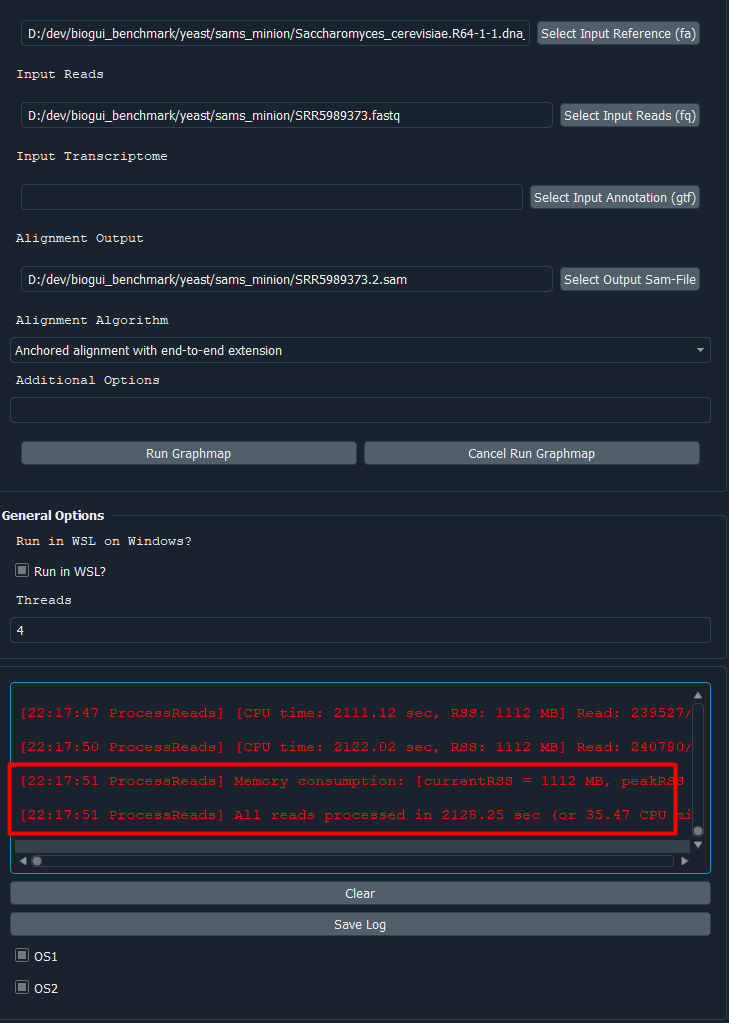
Upon completion, the bioGUI options button (lower left) will become enabled again, as well as the Run Graphmap button. If you need to cancel the current process, click the Cancel Run Graphmap button. You will see all the intermediate output from graphmap and have the option to save the command-line output using the Save log button. If you want to save the inputs you made, using the Save template button of the bioGUI options, you can save the inputs you made. Save the template in the template directory in the same folder as bioGUI to see the template.
Use an Install Module (video tutorial)
If you prefer to understand these steps as part of a video, please have a look attaching
Installing graphmap (from install module) and using it:
Using the circlator docker template:
Adding Own Templates
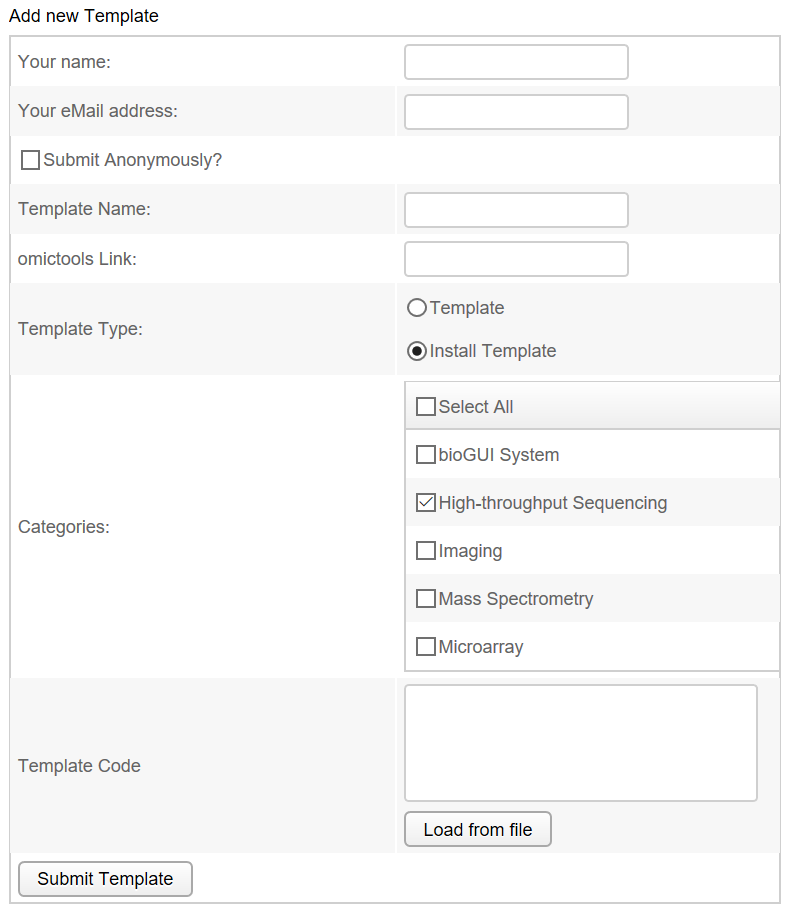
Part of bioGUI is a simple accessibility of templates for various programs. Therefore, application developers and sophisticated users can upload their templates to our website in order to make their template available to other users. The user has to submit his name, eMail address, a template name and the template itself. He can select whether he wants to be an anonymous user (user name is always hidden) and whether this is an installation script (which downloads and creates the ac{GUI} template specifically for this installed application) or a regular template. Additionally, categories for the template can be supplied, e.g. whether this is a template for a sequencing tool, or proteomics. A screenshot of the template submission is shown below.
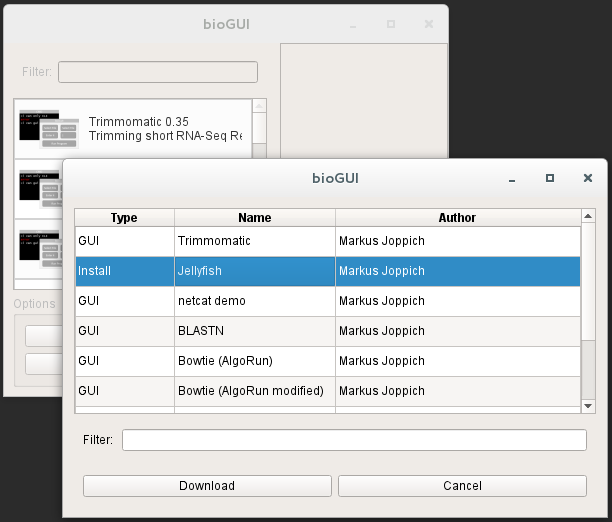
Additionally the (bioGUI website) also contains a searchable list of already available templates. Available templates are only shown and can be downloaded via the bioGUI application.
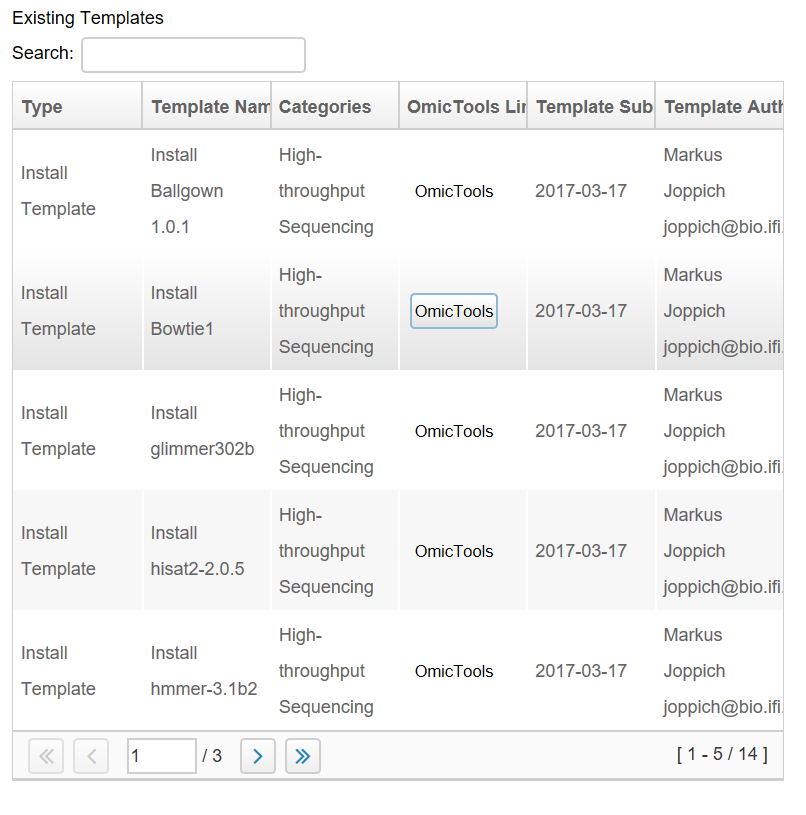
Within bioGUI, clicking the Download Templates button, a new dialog window opens showing a list of available templates. Columns can be sorted by double clicking the header, and using the search only templates which contain the searched words are shown. Upon selecting one or multiple (keep ctrl-key down while clicking) rows and clicking the Download button, those templates are downloaded and available for the user. Since it is possible to copy or alter templates, bioGUI never overwrites existing templates, but will create a new copy.